Wednesday, May 16, 2007

Greek-y Salad


This recipe is a combination of ideas from Ina and Martha. I call it Greek-y becasue it has flavors that remind me of greek food, mint, feta, olives, fresh flavors. It's great with a couple of grilled chicken breasts. It's perfect for summer dinner, not too fussy, light, and lots of flavor. Pound the chicken breasts down to about 1/4 inch, then grill with just salt and pepper. Serve over Greek-y Salad. Israeli cous-cous are big round cou-cous pebbles. I'm trying to incorporate different grains into our meals- I'm sick of noodles and rice. So look for it at the market, or you can use orzo which is great too. This will serve about 4 people. When I make it at home, it's enough for Husband, me and Abbie, with some left over for lunch the next day.

Greek-y Salad

1 cup israeli cous-cous or orzo

1/4 cup lemon juice
1/4 cup olive oil
1/2 tsp. kosher salt
1/4 tsp. freshly ground black pepper

1/2 pt. cherry tomatoes, cut in half
1/2 cup coarsely chopped kalamata olives
2 thinly sliced green onions
6 oc. good feta, cut into 1/2 " cubes
1 tbs. finely chopped mint

Cook cous-cous or orzo in boiling salted water 9-10 minutes.
In a medium bowl, whisk together the lemon juice, olive oil, salt and pepper. Drain the cous-cous or orzo, then add it to the bowl with the dressing, stirring to coat. Let it sit to soak up the dressing, and cool to room temperature. Add the other ingredients to the bowl, and mix gently. Taste for salt and pepper.

Chocolate Chip Cookies


Makes twenty-six 5-inch cookies or 8 1/2 dozen 1 1/4-inch cookies
1 pound unsalted butter
1 3/4 cups granulated sugar
2 1/4 cups packed light-brown sugar
4 large eggs
3 cups plus 2 tablespoons pastry flour
3 cups bread flour
1 tablespoon salt
2 teaspoons baking powder
2 teaspoons baking soda
1 tablespoon pure vanilla extract
2 pounds Jacques Torres House (60 percent cocoa) Chocolate or other best-quality semisweet or bittersweet chocolate, coarsely chopped
Directions

Preheat oven to 350 degrees. Line baking sheets with parchment paper or nonstick baking mats; set aside.
In the bowl of an electric mixer fitted with the paddle attachment, cream together butter and sugars. Add eggs, one at a time, mixing well after each addition. Reduce speed to low and add both flours, baking powder, baking soda, vanilla, and chocolate; mix until well combined.
Using a 4-ounce scoop for larger cookies or a 1-ounce scoop for smaller cookies, scoop cookie dough onto prepared baking sheets, about 2 inches apart. Bake until lightly browned, but still soft, about 20 minutes for larger cookies and about 15 minutes for smaller cookies. Cool slightly on baking sheets before transferring to a wire rack to cool completely.

Saturday, April 07, 2007

Hot Cross Buns


Makes 2 dozen
12 tablespoons unsalted butter, melted and cooled, plus more for bowl, pan, and knife
1 cup whole milk
1/2 cup granulated sugar
4 1/2 teaspoons (2 packages) active dry yeast
1 tablespoon coarse salt
Zest of 1 lemon
Zest of 1 orange
4 large eggs, lightly beaten
5 3/4 cups all-purpose flour, plus more for dusting
1 1/3 cups currants
Bun Crossing Paste
1/2 cup apricot jam
Directions

Generously butter a large bowl; set aside. Place 1 cup milk in a small saucepan, over medium heat. Heat until milk reaches 110 degrees on a candy thermometer. Pour milk into the bowl of an electric mixer fitted with the dough hook attachment. With machine on low speed, add granulated sugar, yeast, salt, butter, lemon zest, orange zest, and eggs. Add flour, and mix on low speed until a soft, slightly sticky dough forms around dough hook. Continue kneading, scraping down hook and sides of bowl as necessary, until smooth, about 4 minutes more.
Add currants; knead, with dough hook, to incorporate. Turn dough out onto a floured surface. Knead briefly to evenly distribute currants in dough. Shape into a ball. Place dough in prepared bowl. Turn to coat with butter. Cover with plastic wrap and let rise in a warm place until doubled in size, about 1 hour and 20 minutes.
Line 2 baking sheets with parchment paper; set aside. Turn dough out onto work surface. Knead briefly and roll dough into a log. Cut log in half and cut each half into 12 equal pieces. Shape each piece into a tightly formed ball. Place on prepared baking sheets 2 inches apart. Cover baking sheets with plastic wrap and let rise in a warm place until buns are touching and doubled in size, 1 1/2 to 2 hours.
Preheat oven to 375 degrees with racks positioned in the upper and lower thirds of the oven. Place bun crossing paste in a pastry bag fitted with a small plain tip or a paper cornet with a 1/8-inch opening. Pipe crosses over the surface of each bun. Transfer buns to oven and bake until golden brown, 18 to 25 minutes, rotating baking sheets after 10 minutes. Transfer to a wire rack and cool to room temperature.
Meanwhile, place apricot jam in a small saucepan over medium heat. Cook until heated through; strain through a mesh sieve set over a bowl. Brush heated jam over buns.

Saturday, January 13, 2007

Cookie Jar: Chewy Cherry Oatmeal Cookies


My plan was to not make any cookies, brownies, cakes, cupcakes, or any other sweet treats until February. I got to January 13th. I have a terrible sweet tooth. I really needed a cookie. These are almost good for you, right? And Abbie will eat most of them, and my husband will eat the rest. I only made a 1/2 recipe, and used a 1 1/2 tsp. scoop for the cookies. Because the cookies were going to be so small and cherries are so big, I quartered the cherries. These hit the spot. Abbie was sous chef on these. They were on Martha Stewart a couple of days ago.

Chewy Cherry-Oatmeal Cookies

Makes about 4 dozen (I got about 4 dozen from a half batch and small scoop)

1 1/4 cups all-purpose flour
1 1/2 tsp. ground cinnamon
1 tsp. baking soda
1/4 tsp. freshly grated nutmeg
1/2 tsp. salt
1 cup (2 sticks) unsalted butter, softened, or 1 cup apple butter (a healthier alternative)
1 cup packed light-brown sugar
1/4 cup honey
2 large eggs
1 1/2 tsp. pure vanilla extract
3 cups Quaker Old-Fashioned Rolled Oats
1 cup dried cherries

Preheat oven to 350°. Line 2 baking sheets with nonstick baking mats or parchment paper. In a small bowl, whisk together the flour, cinnamon, baking soda, nutmeg, and salt; set aside. Place butter, sugar, and honey in the bowl of an electric mixer fitted with the paddle attachment; beat on medium-high speed until light and fluffy, about 4 minutes. Add the eggs and vanilla, and beat to combine. With the mixer on low, gradually add reserved flour mixture and beat until incorporated. Stir in oats and cherries. Drop 1 tablespoon of dough at a time about 2 inches apart on prepared baking sheets. Bake until lightly golden brown, 10 to 12 minutes. Let cool on sheets for 5 minutes, then transfer cookies to a wire rack to cool completely. Cookies can be kept in an airtight container at room temperature for up to 3 days.

Friday, January 12, 2007

Whole Wheat Blueberry Muffins


I'm really not a big fan of fat-free, hey, it's just like the regular kind, but all the flavor has been removed, food. I'd rather have the full fat, or maybe lowish fat food, but just eat less of it. I know there are those out there that disagree. They want to eat as much of whatever food as they want, so those fat-free options are a good thing. Hopefully, those people also can't taste their food, because so much of it really tastes bad. I read an article in the paper about how chair manufacturers have had to increase the dimensions of chair seats because American's butts are so big. A common stool chair used to be 12 inches wide, now it's 18 inches. I'm getting to my point here. While I don't usually like low or fat free food, it's January. After the baking I did last month, I'm going to need an extra large lazy-boy if I don't find some less indulgent recipes for a while. We went out to breakfast as a family the other day- something we rarely do, but was very nice all the same, and Abbie was asking for muffins. These were giant, covered in sugar almost like a small cake muffin. I knew I could make something almost as delicious, and certainly better for her. I ended up making smaller muffins, so my yield was about 18 muffins. The nutritional info for the original recipe was about 120 calories per muffin, so I imagine my smaller portion muffin is closer to 100. I have them in a bag in the freezer, and wrap 1 in a paper towel, nuke it for 30 seconds and voila! a healthy breakfast. How are they? Delicious, of course! They came out light and fluffy, not heavy little hockey puck muffins at all. They have a slight whole wheat flour flavor at the end, but they are whole wheat, so what are you gonna do? They still taste great. I used the nonfat yogurt, because I can only buy huge quantities of buttermilk at the store, and it's a waste to buy so much just to throw it away. You can make your own buttermilk by adding 1 tbs. vinegar to 1 cup nonfat milk, if you choose. I did have to add just a little very coarse sanding sugar on the top of each one, which gives it a terrific crunch.

Whole Wheat Blueberry Muffins
12 muffins

1 cup wholewheat flour
3/4 cup all-purpose flour
1/2 cup firmly packed brown sugar
1 tbs. + 1 tsp. baking powder
1 tsp. ground cinnamon
1/2 tsp. ground allspice
1/2 tsp. salt
1 cup nonfat buttermilk , or 1 cup non-fat plain yogurt
2 tbs. canola oil
2 tbs. unsweetened applesauce
1 egg, lightly beaten
1 cup fresh or frozen blueberries

Preheat the oven to 400ºF. Lightly spray a muffin tin with cooking spray. (Or just use the little papers like I did. I love the little plain white papers you can find at Michael's or a baking supply store.)

In a large bowl, combine the flours, brown sugar, baking powder, cinnamon, allspice and salt. In another bowl, whisk together the buttermilk, oil, applesauce and egg. Pour the buttermilk mixture into the dry mixture, stirring until it is just combined (do not over mix). Toss unthawed frozen blueberries with two tablespoons of flour before adding them to the batter to keep them from turning the batter purple while the muffins bake. Lightly stir in the blueberries.

Spoon the batter evenly into the prepared muffin cups. Bake until the tops are golden, 20 to 25 minutes. Transfer the pan to a wire rack to cool slightly. Then transfer the muffins to cooling rack. Serve warm.

Thursday, January 11, 2007

Semolina Dough for Flat Pasta


Last summer my mother in law took me to a cooking demonstration and tasting. One of the highlights of the evening was rolling fresh pasta. I took my little bundle home, and served it with some simple red sauce. Absolutely delicious. Anyway, while I was at the demonstration, I asked the chef about the pasta recipe. He told me he used a recipe from Paul Bertolli's Cooking By Hand. It's a beautiful book, full of instructions on preparing all sorts of lovely (and not so lovely- how to butcher and prepare your own whole pig) italian things. So I was very eager to receive this book for Christmas, pull our dusty pasta machine out of the cupboard and get to work. I chose to prepare the Semolina Dough for Flat Pasta, and was a little disappointed with the results. I carefully measured the ingredients, and kneaded the dough by hand. It did form a nice little springy ball. I let it sit for about 3 hours, then cut it into 6 pieces, flattened the pieces, and fed them each through my machine, adding enough flour so they wouldn't stick. Here is where I think I went wrong first. I started on the #2 setting, rolled #4, then #6, ending with a really thin pasta. Then I used the angel hair cutter. Mistake number 2. I let the pasta dry out a little, then started a big pot of water with enough salt to taste like the sea. I let the water come to a boil, then dumped my pasta in and (mistake #3) let it cook too long. I drained it, and added it to the sauce. It was very tasty, but a mushy mess. I don't know if you've ever overcooked fresh pasta before, but you end up kind of cutting it out of the serving bowl in chunks. My brother in law came to dinner that night, and was very kind, finishing every last strand with my dear husband. Although this was a bit disappointing, my fresh pasta days have just begun! -and I will cook again. Next time, though, I think I'll follow the directions.

Semolina Dough for Flat Pasta
For 4
Serve with a simple tomato sauce or with meat, poultry, or game sugo, the depth of flavor of which is best carried by pasta with a substantial bite and sturdiness.

10 ounces extra fancy semolina
4 ounces cool water
Pour the water into a bread bowl or the bowl of an electric mixer. While mixing with a fork or the mixer's paddle attachment, pour the water into the center of the dough. When the flour begins to clump, start gathering and kneading the dough by hand. Continue to knead the dough until it loses its stiffness, is well incorporated with the water. feels smooth when and bounces back when depressed. Wrap the dough in plastric and set it aside to hydrate for 1 1/2 hours. Roll the pasta once through the next to last setting of a pasta machine and cut it to a width of your choosing.

Tuesday, January 09, 2007

Black and White Angel Food Cake


This wonderful cake from Ina's new book, Barefoot Contessa At Home, is delicious! I wish I had a better picture of the cake itself, but you see the 2 year old can't get enough- so it must be good! I wanted to make a dessert that was on the light side for a New Year's dinner, but that had a lot of flavor, and felt like dessert- not some fruit thing disguised as dessert. Just fantastic. I saw Martha Stewart make some angel food cakes today in mini angelfood pans- like muffin tins. This would be great for that. Maybe bake for only 25-30 minutes. I covered the entire cake like frosting with the glaze, and used my food processor to grate the chocolate.


Black and White Angel Food Cake

2 cups sifted superfine sugar (about 1 pound)
1 1/3 cups sifted cake flour (not self-rising)
1 1/2 cups egg whites at room temperature (10 to 12 eggs)
3/4 tsp. kosher salt
1 1/2 tsp. cream of tartar
1 tsp. pure vanilla extract
1/2 cup coarsely grated semisweet chocolate
For the glaze:
1/2 pound semisweet chocolate chips
3/4 cup plus 1 tablespoon heavy cream


Preheat the oven to 350 degrees F.
Combine 1/2 cup of the sugar with the flour and sift them together 4 times. Set aside.

Place the egg whites, salt, and cream of tartar in the bowl of an electric mixer fitted with the whisk attachment and beat on high speed until the eggs form medium-firm peaks, about 1 minute. With the mixer on medium speed, add the remaining 1 1/2 cups of sugar by sprinkling it over the beaten egg whites. Beat on high speed for a few minutes until thick and shiny. Add the vanilla and continue to whisk until very thick, about 1 more minute. Scrape the beaten egg whites into a large bowl. Sift 1/4 of the flour mixture over the egg whites and fold it very carefully into the batter with a rubber spatula. Continue adding the flour in 3 equal additions, sifting and folding until it's all incorporated. Fold in the grated chocolate.

Pour the batter into an ungreased 10-inch tube pan, smooth the top, and bake it for 35 to 45 minutes, until it springs back to the touch. Remove the cake from the oven and invert the pan on a cooling rack. When cool, run a thin, flexible knife around the cake to remove it from the pan.

For the chocolate glaze, place the chocolate chips and the heavy cream in a heat-proof bowl over a pan of simmering water and stir until the chocolate melts. Pour the chocolate over the top of the cooled cake to cover the top completely and allow it to drizzle down the sides. If you have chocolate glaze left over, you can serve it on the side with the cake.

Wednesday, January 03, 2007

Happy New Year!

Hi everyone, and Happy New Year! I want to send an apology to my growing number of readers. I have been trying to post over the past few weeks, but I'm not able to attach pictures to my posts. I've complained and asked for help, but to no avail. I do have about 3 or 4 posts in draft form, but who wants to read a food blog with no pictures! So please be patient, and keep checking back! I'll get this sorted soon, I hope!
-Me-me

UPDATE:
Hooray!! It looks like the problem has been solved! I've been able to finish the December/Christmas posts. Please take a look. I have been doing some baking this month, and am looking forward to working on some bread recipes. Stay tuned!

Monday, December 25, 2006

Buche de Noel


MERRY CHRISTMAS!!

Buche de Noel
I hope everyone has had a Merry Christmas. I spent some of Christmas Eve baking the sponge for our Buche, then took some time out Christmas day to come home and finish the marscapone cream and chocolate ganache. This was my first Buche de Noel, and I can honestly say I don't think I need to make another. I used the recipe from Baking Illustrated. It was good, but not totally awe-inspiring. I found the marscapone cream to be not creamy enough. The ganache was delicious, but it was chocolate, so how can you go wrong? The most fun came in the decorating. The pine needles are sprigs of rosemary dipped in egg-wash, and sprinkled with superfine sugar. The mushrooms were made from meringue, then brushed with cocoa powder using a pastry brush. I already have some ideas for next year....

Saturday, December 23, 2006

Chocolate Hazelnut Cookies


Another recipe from Gourmet- but this year's issue. Absolutely-delicious-make-again cookies. They were like little brownies out of the oven, and got better with age. You could really taste the hazelnuts. Hazelnuts are a giant pain. I don't care how long you roast some of them, their little skins aren't coming off. Do the best you can. Be careful with the nuts in the food processor. It's easy to end up making hazelnut butter.

Chocolate Hazelnut Cookies
2/3 cup hazelnuts
2 tbs. granulated sugar
6 oz fine-quality bittersweet chocolate (no more than 60% cacao if marked), finely chopped
2 3/4 cups all-purpose flour
2 tbs. unsweetened cocoa powder
2 tsp. baking powder
3/4 tsp. salt
1 stick (1/2 cup) unsalted butter, softened
1 1/2 cups packed light brown sugar
2 large eggs
1/4 cup whole milk
1 tsp. pure vanilla extract
3/4 cup confectioners sugar

Put oven rack in middle position and preheat oven to 350°F.
Toast hazelnuts in a shallow baking pan in oven until skins split and nuts are pale golden, about 10 minutes. Remove from oven (turn oven off), then wrap hazelnuts in a kitchen towel and rub to remove any loose skins. Cool nuts completely. Pulse nuts with granulated sugar in a food processor until finely chopped.
Melt chocolate in a metal bowl set over a saucepan of barely simmering water or in top of a double boiler, stirring until smooth. Remove bowl from heat and set aside.
Whisk together flour, cocoa powder, baking powder, and salt in a bowl.
Beat together butter and brown sugar in another bowl with an electric mixer at medium-high speed until creamy, about 3 minutes. Add eggs 1 at a time, beating well after each addition, then beat in melted chocolate until combined. Add milk and vanilla, beating to incorporate. Reduce speed to low and add flour mixture, mixing until just combined. Stir in nut mixture. Cover bowl with plastic wrap and chill dough until firm, 2 to 3 hours.

Put oven racks in upper and lower thirds of oven and preheat oven to 350°F. Line 2 large baking sheets with parchment paper. Sift confectioners sugar into a bowl. Halve dough and chill 1 half, wrapped in plastic wrap. Roll remaining half into 1-inch balls, placing them on a sheet of wax paper as rolled. Roll balls, 3 or 4 at a time, in confectioners sugar to coat generously and arrange 2 inches apart on lined baking sheets.
Bake, switching position of sheets halfway through baking, until cookies are puffed and cracked and edges feel dry (but centers are still slightly soft), 12 to 18 minutes total. Transfer cookies (still on parchment) to racks to cool completely.
While first batch is baking, roll remaining dough into balls. Line cooled cookie sheets with fresh parchment, then coat balls with confectioners sugar and bake in same manner.
Cookies keep, layered between sheets of parchment or wax paper, in an airtight container at room temperature 5 days.

Makes about 7 dozen cookies.
Gourmet
December 2006

Friday, December 22, 2006

Spoon Cookies


This is another recipe from last year's December Gourmet. It was fetaured with an article that begins, "Every year, at Christmas I make the best cookies". With a claim like that, I had to make them. They really are delicious, yet tedious to make. They have a lot of butter flavor, and despite being on the large side for a cookie, very delicate. These were my mother in law's favorite. You must wait to eat them- they definitely get better with age.

Spoon Cookies

2 sticks (1 cup) cold unsalted butter, cut into pieces
3/4 cup sugar
2 teaspoons vanilla
2 cups all-purpose flour
1 teaspoon baking soda
1/8 teaspoon salt, slightly rounded
1/3 cup fruit preserves (your choice)

Special equipment: a deep-bowled teaspoon (not a measuring spoon)


Make dough:
Fill kitchen sink with about 2 inches of cold water. Melt butter in a 2- to 3-quart heavy saucepan over moderate heat and cook, stirring occasionally, until butter turns golden with a nutlike fragrance and flecks on bottom of pan turn a rich caramel brown, 10 to 12 minutes. (Butter will initially foam, then dissipate. A thicker foam will appear and cover the surface just before butter begins to brown; stir more frequently toward end of cooking.) Place pan in sink to stop cooking, then cool, stirring frequently, until butter starts to look opaque, about 4 minutes. Remove pan from sink and stir in sugar and vanilla.

Whisk together flour, baking soda, and salt in a small bowl and stir into butter mixture until a dough forms. Shape into a ball, wrap with plastic wrap, and let stand at cool room temperature 1 to 2 hours (to allow flavors to develop).

Form and bake cookies:
Put oven rack in middle position and preheat oven to 325°F.

Press a piece of dough into bowl of teaspoon, flattening top, then slide out and place, flat side down, on an ungreased baking sheet. (Dough will feel crumbly, but will become cohesive when pressed.) Continue forming cookies and arranging on sheet. Bake cookies until just pale golden, 8 to 15 minutes. Cool cookies on sheet on a rack 5 minutes, then transfer cookies to rack and cool completely, about 30 minutes.

Assemble cookies:
While cookies cool, heat preserves in a small saucepan over low heat until just runny, then pour through a sieve into a small bowl, pressing hard on solids, and cool completely.

Spread the flat side of a cookie with a thin layer of preserves. Sandwich with flat side of another cookie. Continue with remaining cookies and preserves, then let stand until set, about 45 minutes. Transfer cookies to an airtight container and wait 2 days before eating.

Cooks' notes:
• Dough can be made 12 hours before baking and chilled, covered. Bring to room temperature to soften slightly before forming cookies, about 30 minutes.
• Cookies keep in an airtight container at room temperature 2 weeks.

Makes about 30 sandwich cookies.
Gourmet
December 2005
Adapted from Celia Barbour

Wednesday, December 20, 2006

White Chocolate Bark


Another of the gifts for friends. Absolutely delicious, and practically no cooking. I made gift baskets for friends with homemade treats in one afternoon. So cute, greatly appreciated and very easy. I used the mini candy canes becasue the grocery store was out of the big ones. This is another Martha Stewart. I added the chocolate drizzle on the top.

Peppermint Bark

Makes 2 1/4 pounds or one 11-by-17-inch sheet
If you don’t have a double boiler, use a metal bowl set over a pot of simmering water.


2 pounds white chocolate, chopped into 1/2-inch pieces

12 large candy canes

1/2 tsp. peppermint oil

2 oz. semi-sweet chocolate, melted

Line an 11-by-17-inch baking sheet with parchment, and set aside. In the top of a double boiler, melt white chocolate, stirring constantly. With a chef’s knife or meat tenderizer, cut or pound candy canes into 1/4-inch pieces. Stir pieces of candy canes and peppermint oil into the melted chocolate. Remove from heat, and pour the mixture onto the prepared baking sheet; spread evenly. Chill until firm, 25 to 30 minutes. Drizzle melted semisweet chocolate over the top, if desired. Break into pieces, and serve. Store in an airtight container in the refrigerator for up to 1 week.

Monday, December 18, 2006

Nut Brittle


This nut brittle was made for gifts for friends. It was so easy and so much fun to break. But beware of very hot melted sugar. It can be scary stuff. I used pecans, cashews and hazelnuts becaus that is what I had in my freezer. Martha Stewart featured this recipe as part of her home-made gifts series. She suggested you buy a small baking sheet and give the brittle with a tiny hammer, letting the recipient break it herself. It's a cute idea.

Nut Brittle Block

Makes one 9-by-13-inch pan

unsalted butter, softened, for baking sheet
vegetable oil, for spatula

1 1/2 cups sugar
1/2 cup light corn syrup
pinch of salt
2 1/2 cups unsalted nuts, such as dry-roasted peanuts, cashews, hazelnuts, almonds or pecans, or toasted pumpkin seeds
1 tsp. pure vanilla extract
1 tsp. baking soda

Brush a 9-by-13-inch rimmed baking sheet with butter, and oil an offset spatula; set aside. Put sugar, corn syrup, and salt in a medium saucepan with 1/4 cup cold water. Bring to a boil over medium-high heat, stirring until sugar has dissolved. Wash down sides of the pan with a wet pastry brush to prevent crystals from forming. Cook, swirling the pan occasionally, until the mixture registers 238° on a candy thermometer (soft-ball stage). Stir in nuts, and continue to cook, stirring often so that the nuts do not burn, until the mixture is medium amber in color, 10 to 15 minutes.
Carefully stir in vanilla and baking soda (the mixture will foam up). Pour onto prepared baking sheet, and using oiled offset spatula, quickly spread into a 1/2-inch-thick layer. Let cool completely. Break brittle into pieces if desired; store in an airtight container at room temperature up to 1 month.

Recipe from Martha Stewart Holiday Handmade Gifts, December 2006. When giving as a gift, package this brittle block with cellophane, and include a small hammer and bow.

Seven Layer Cookies


I really wanted to try to make these after I saw the recipe in the December Gourmet last year. They just looked so pretty. Two of the cookie recipes featured reminded me of my east coast bakery experiences, these and the black and white cookies. I made the black and white last year. I think these came out beautifully. You really have to like almond flavor. Abbie wasn't crazy about them.
Seven Layer Cookies

4 large eggs, separated
1 cup sugar
1 (8-oz) can almond paste
2 1/2 sticks (1 1/4 cups) unsalted butter, softened
1 teaspoon almond extract
2 cups all-purpose flour
1/2 teaspoon salt
25 drops red food coloring
25 drops green food coloring
1 (12-oz) jar apricot preserves, heated and strained
7 oz fine-quality bittersweet chocolate (not unsweetened), chopped

Special equipment: a heavy-duty stand mixer; a small offset spatula


Put oven rack in middle position and preheat oven to 350°F. Butter a 13- by 9-inch baking pan and line bottom with wax paper, leaving a 2-inch overhang on 2 ends, then butter paper.

Beat whites in mixer fitted with whisk attachment at medium-high speed until they just hold stiff peaks. Add 1/4 cup sugar a little at a time, beating at high speed until whites hold stiff, slightly glossy peaks. Transfer to another bowl.

Switch to paddle attachment, then beat together almond paste and remaining 3/4 cup sugar until well blended, about 3 minutes. Add butter and beat until pale and fluffy, about 3 minutes. Add yolks and almond extract and beat until combined well, about 2 minutes. Reduce speed to low, then add flour and salt and mix until just combined.

Fold half of egg white mixture into almond mixture to lighten, then fold in remaining whites gently but thoroughly.

Divide batter among 3 bowls. Stir red food coloring into one and green food coloring into another, leaving the third batch plain. Set white batter aside. Chill green batter, covered. Pour red batter into prepared pan and spread evenly with offset spatula (layer will be about 1/4 inch thick).

Bake red layer 8 to 10 minutes, until just set. (It is important to undercook.)

Using paper overhang, transfer layer to a rack to cool, about 15 minutes. Clean pan, then line with wax paper and butter paper in same manner as above. Bake white layer in prepared pan until just set. As white layer bakes, bring green batter to room temperature. Transfer white layer to a rack. Prepare pan as above, then bake green layer in same manner as before. Transfer to a rack to cool.

When all layers are cool, invert green onto a wax-paper-lined large baking sheet. Discard paper from layer and spread with half of preserves. Invert white on top of green layer, discarding paper. Spread with remaining preserves. Invert red layer on top of white layer and discard wax paper.

Cover with plastic wrap and weight with a large baking pan. Chill at least 8 hours.

Remove weight and plastic wrap. Bring layers to room temperature. Melt chocolate in a double boiler or a metal bowl set over a saucepan of barely simmering water, stirring until smooth. Remove from heat. Keep chocolate over water.

Trim edges of assembled layers with a long serrated knife. Quickly spread half of chocolate in a thin layer on top of cake. Chill, uncovered, until chocolate is firm, about 15 minutes. Cover with another sheet of wax paper and place another baking sheet on top, then invert cake onto sheet and remove paper. Quickly spread with remaining chocolate. Chill until firm, about 30 minutes.

Cut lengthwise into 4 strips. Cut strips crosswise into 3/4-inch-wide cookies.

Cooks' note:
Cookies keep, layered between sheets of wax paper or parchment, in an airtight container at room temperature 2 weeks.

Makes about 5 dozen cookies.
Gourmet
December 2005

Thursday, December 14, 2006

Cookie Decorating


Abbie's playgroup has had a cookie exchange party for the past 2 years now. It's really cute and fun to see the kids running around (someone's else's house) on a total sugar-induced euphoria. I asked Abbie what kind of cookie's we should bring this year. She quickly responded "cookie friends". I understood this to mean, "Mommy, I would like to make the delicious iced sugar cookies that we've made for my friends before. But these cookies should be decorated in a delightful Christmas theme. I will lick off the icing and discard the cookie with each one you give to me."


So we made cookies! I put aside a little more than half the dough for the cookie exchange, then Abbie and I made cookies for our family. Abbie did all the decorations for the home cookies. They were adorable.

I decorated the rest. At the party, they were the first things to go. Kids and royal icing. They dig it.
I picked up my new favorite cookie decoration at the cake decorating store. Look closely at the snowman and Christmas tree cookies. Those are tiny little candy canes! They're extruded little sprinkle things. They actually taste like peppermint, too.

Sunday, December 10, 2006

Chocolate Truffles


As I said, I really like to give homemade gifts. Not only is it more economical, but I think people are more impressed that you actually spent the time to make them something. I really have some issues with chocolate. I love to eat it, but I haven't learned the science behind it. I'd love to take a class. Anyway, I saw that Ina had made truffles and it looked so easy. And it is! I've made Hazelnut truffles and Kahlua truffles so far. Just substitute in your favorite liqueur. I did have one probelm. I tried to make Ina's white chocolate truffles as well. They're flavored with Bailey's, but I just couldn't get it to solidify. I don't know why. Some day I'll find out. However, the dark chocolate ones do not disappoint. Eat one with a warm cup of coffee. I think I may do that right now.
This recipe comes from Barefoot in Paris.

Chocolate Truffles

3 1/2 ounces bittersweet chocolate
3 1/2 ounces semisweet chocolate
1/2 cup heavy cream
1 1/2 tbs. liqueur (Grand Marnier, Frangelico, Baileys, Kahlua)
1 tbs. prepared coffee
1/2 tsp. good vanilla
cocoa powder
chopped roasted hazelnuts

Chop the chocolate finely and place in a bowl.
Heat the cream in a small saucepan until it boils. Immediately pour the hot cream through a fine-mesh seive into the bowl with the chocolates. with a wire whisk, slowly stir the cream and the chocolate together ubtil the chocolate is completely melted. Whisk in the liqueur, coffee, and vanilla. Cover with plastic wrap, and chill until set, about 45 minutes.
With two teaspoons, or a 1 1/4 inch ice cream scoop, make dollops of the chocolate mixture and place on a baking sheet lined with parchment. Refrigerate 15 minutes, until firm enough to roll into balls. Roll in cocoa powder or nuts and chill.

Ina says don't use chocolate chips, as they may have stabilizers.
I had a 3 ounce bar of bittersweet chocolate, so I did 3 ounces bittersweet, 4 ounces semisweet.
The kind of chocolate is important. It needs to be really good. I used Scharffen Berger and Ghirardelli.
You'd be surprised how easily choclate melts from the heat of your hands. Try not to touch it when you're chopping it up.
Roast whole hazelnuts 25 minutes, 350 degrees. Put all the nuts in a kitchen towel, and rub the skins off. Roast chopped hazelnuts 350 degrees, 10 minutes.
I needed to put the choclate over a doulbe boiler to get it completely melted.
Keep the truffles refrigerated. Remind the recipient that they should keep the truffles in the fridge.
They shouldn't be prefect little balls. They are supposed to look like the mushroom truffles that those pigs find in Europe. Yes, those pigs.

Mommy's Cookie House


I've never made a gingerbread house before. I looked on the internet for ideas. I checked my various baking books. I looked in catalogues for decorating ideas. Here's what I found out. Most people buy a kit, or a ready-made gingerbread house. Most people like to decorate their house with lots of candy. Many gingerbread houses are ugly. Gingerbread houses are expensive. Royal icing is the glue that keeps a gingerbread house together- use lots of it. Many people make their own design for gingerbread houses.

So- I got out my gingerbread recipe. I figured out that what makes a good gingerbread cookie, doesn't neceassarily work for a gingerbread house. A cookie should be moist and lovely. A house needs to be cardboard-like. I decided I would bake my pieces longer, so they would dry out. I had a recipe for royal icing, that would keep a real house together. I really didn't like the candy houses, though. I wanted my house to be more organic, and earthy. Forgive me for sounding like a hippy. I wanted it to smell delicious, and it does. I got to work. It took me about an hour to come up with the design, and make a cardboard cut out. I made and baked the gingerbread parts to the house. They expanded. And the dimensions changed. Hmmmm. How do people deal with that? Royal Icing! I used lots of it. And I added some well hidden cinnamon sticks to fill the very large gaps. I used star anise, cloves, pink peppercorns, rosemary, and allspice for the decorations. The roof is lined with pecan shingles. I think it's cute. Abbie calls it Mommy's Cookie House- no touch. Although she has nibbled the threshold, and ate the doormat completely before I could glue it to the house. But I have one more question. Now what do I do with it?

UPDATE:
I had a bit of a problem with the longevity of Mommy's Cookie house. It colapsed shortly after I made it-3-4 days. We had a lot of rain, and my gingerbread was too moist. I was told at my favorite cake supply store to not use butter-but replace it with shortening, and also decrease the baking temperature but bake it longer. Hmmm. Next year.

Thursday, December 07, 2006

Pumpkin Bread


Aundra had a Christmas party to go to, and wanted to make a pumpkin pie. She came over and made a beautiful pie that I think was a big hit at her party. When we were cleaning up, I noticed we had some pumpkin left over. If you've ever baked and pureed your own pumkin, you know how precious the stuff is. So I decided to whip up some pumpkin bread. I like to make the little loaves, and use them with cookies and candy to make homemade Christmas gifts for friends and the mailman. We have the best mailman. Anyway, my pumpkin bread recipe comes from The All New All Purpose Joy of Cooking. I thought it was going to be the last Joy of Cooking, as it was a big deal when this version came out, but they just recently came out with a newer All New All Purpose Joy of Cooking. The Joy of Cooking is a total go-to book for anything you think you'd like to make. We've used it many, many times, which is possibly why the index pages keep falling out. Or could it be becasue I bought it at Costco? So now I guess I'll have to get the newer updated version. After all, my old one is falling apart.

Pumpkin Bread

1 1/2 cups flour
1 1/2 tsp. cinnamon
1 tsp. baking soda
1 tsp. kosher salt
1 tsp. ground ginger
1/2 tsp. freshly ground nutmeg
1/4 tsp. ground cloves
1/4 tsp. baking powder
1/3 cup milk
1/2 tsp. vanilla
6 tbs. unsalted butter, room temperature
1 1/3 cups granulated sugar, or 1 cup sugar and 1/3 cup packed brown sugar
2 large eggs
1 cup pumpkin puree

Preheat oven to 350 degrees. Grease 1 large or 4 mini loaf pans. Whisk together dry ingredients in a large bowl. Pour out the milk in a measuring cup, and add the vanilla to it. In the bowl of a stand mixer fitted with the paddle attachment, beat the butter until creamy. Gradually add the sugar, and beat on high speed until lightened, about 4 minutes. Beat in eggs one at a time. Add pumpkin and beat on low until just combined. Add the flour mixture in 3 parts, alternating with the milk mixture in 2 parts, scraping down the sides of the bowl as necessary.
Scrape the batter into the pans and spread evenly. Bake 1 hour for a large loaf and about 30 minutes for mini-loaves, until a toothpick inserted in the center comes out clean.

Make sure your homemade pumpkin puree is always drained. I put mine in a fine mesh stariner lined with cheesecloth for about 1/2 hour before using.
A little note about eggs. I used to be very bold about eggs. I'd just crack them into the bowl without a care. Then one time, I was making cookie dough, and I accidentally dropped egg shell into the batter. I thought I had gotten it all out, until I started rolling out the dough and saw that it was speckled with egg shell. I had to throw it all out, and start again. Now I always crack the eggs into a bowl or a measuring cup first.

Monday, December 04, 2006

Louise's Ginger Crinkles


I know I've been neglectful in not posting this month- but that doesn't mean I haven't been cooking! These cookies are absolutley delicious. When December rolls around, I start thinking about what cookies I'm going to make for Christmas. We just couldn't wait to have a batch of these in the cookie jar. This recipe is from Louise, who wrote at the bottom of the recipe, "Never fails". Indeed.

Louise's Ginger Crinkles

2/3 cup vegetable oil
1 cup granulated sugar
1 egg
1/4 cup molasses (I use Grandma's)
2 cups flour
2 tsp. baking soda
1 tsp. salt
1 tsp. cinnamon
1/2 tsp. ginger
1/2 cup coarse sugar for dipping

Preheat oven to 350 degrees. Int he bowl of a mixer fitted with the paddle attachment, mix the oil and sugar well. Add the egg and beat well. Stir in the molasses. Whisk the dry ingredients together in a medium bowl. Add the dry ingredients to the mixer bowl and beat until the dough comes together. Maek 1/2 oz. balls of dough, and roll in coarse sugar. Bake on a silpat or parchment lined baking sheet 10 minutes. Move cookies to a rack after 2-3 minutes cooling on the baking sheet. Makes about 5 dozen.

I buy coarse sugar at the cake decorating shop. It really makes a difference in the texture of the crinkle.
I know it's a little obsessive to weigh each cookie, but it keeps them uniform in size.

Tuesday, November 28, 2006

It's the PIES! Part 2: the Apple Pie


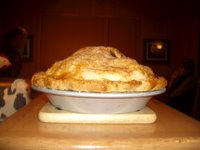
I wanted to work on my apple pie recipe this year. The one I usually use- it's great don't get me wrong- but it's from the back of the frozen pie crust box. My secret is out! But it's not a bad recipe. And it always comes out just fine. But I wanted to try something a little more daring. Ina has an apple pie recipe that I've tried before, but I felt like it had too much citrus. Everyone at my party thought it was great, but I wasn't crazy about it. I am really in love with a cookbook I received last Christmas- Baking Illustrated. It's from the Cook's Illustrated/ America's Test Kitchen people. I looked up their recipe for apple pie and thought I'd give it a go. The juice was really wonderful, but I think I would try different apples in the future. I didn't care for the McIntosh, and would prefer some Romes, Gravensteins or Galas. Because I used my crust recipe, I had one of those big airy crust tents, where the crust sets up before the apples cook down and settle, but that was OK. Once you cut into the pie, the crust fell neatly over the apples. I loved the hint of lemon, from the zest. This pie was delicious- especially good with some Hagen Daas, or fresh whipped cream.
A note about the pie plate- My mother-in-law bought me this pie plate a couple of years ago and I was very skeptical. But I have to say, it works brilliantly. It's got these little bumps in it that make the crust so crisp, even underneath where it's usually kind of soggy. It comes with a ring that you can put over your crust if it's getting too dark, as well. I give it a big kitchen tool thumbs up!

Apple Pie

1 recipe double pie dough
2 tbs. all-purpose flour
3 large Granny Smith apples (about 1 1/2 pounds)
4 large MacIntosh apples (about 2 pounds)
1 tbs. juice and 1 tsp. grated zest from 1 lemon
3/4 cup sugar
1/4 tsp. freshly grated nutmeg
1/4 tsp. ground cinnamon
1/8 tsp. ground allspice
1/4 tsp. kosher salt
1 egg white, beaten lightly
1 tbs. coarse sugar

Place a rimmed baking sheet on the lowest oven rack. Preheat oven to 500 degrees.
Repeat the process for the pumpkin pie crust as follows. When you're ready to make pie, take the dough out to temper a bit before you try to roll it. Spray your pie plate with a little Pam, or vegetable oil. (In theory, this means you could remove your pie from the pie plate before you serve it, because it won't be stuck to the plate (big oooo! factor here), but I do this because I think it helps the bottom brown, and it makes serving easier.) Roll out the dough to fit your pie plate, on a lightly floured board. Gently transfer the dough to the pie plate without stretching the dough. (Stretching is bad, it means shrinkage.) Press the dough along the sides of the plate, and then refrigerate the dough-lined pie plate.
Peel, core and quarter the apples. Cut the quarters into 1/4 inch slices, then toss with the lemon juice and zest. In a medium bowl, mix 3/4 cup granulated sugar, the flour, spices and salt. Toss the dry ingredients with the apples. Turn the fruit mixture, including the juices into the chilled pie shell and mound it in the middle.
Roll out the second piece of dough. Place it over the filling. Trim the edges of the top and bottom layers to 1/2 inch over the edge of the pie plate. Tuck the dough over itself so that it is even with the pan lip. Flute the edge, or seal it with a fork. Cut 4 slits in the top. Put the whole pie in the freezer for 10 minutes. Brush the egg white on the top crust, and sprinkle it evenly with the coarse sugar.
Place the pie on the baking sheet in the oven and lower the temperature to 425 degrees. Bake the pie until the top crust is golden, about 25 minutes. Rotate the pie from front to back and reduce the oven temperature to 375 degrees. Continue baking until the juices bubble and the crust is deep golden brown, 30-35 minutes longer. Transfer the pie to a wire rack to cool.

I use a melon-baller to core the apples.
Trying to mound all those apples in the pie shell is hard, but totally worth it. Do your best.
A note about the coarse sugar- I really like the way coarse sugar looks on baked goods. It's got much larger granules than regular granulated sugar. I buy it at the local cake supply shop, but I bet you could find it at Michael's as well.