Tuesday, November 28, 2006

It's the PIES! Part 2: the Apple Pie


I wanted to work on my apple pie recipe this year. The one I usually use- it's great don't get me wrong- but it's from the back of the frozen pie crust box. My secret is out! But it's not a bad recipe. And it always comes out just fine. But I wanted to try something a little more daring. Ina has an apple pie recipe that I've tried before, but I felt like it had too much citrus. Everyone at my party thought it was great, but I wasn't crazy about it. I am really in love with a cookbook I received last Christmas- Baking Illustrated. It's from the Cook's Illustrated/ America's Test Kitchen people. I looked up their recipe for apple pie and thought I'd give it a go. The juice was really wonderful, but I think I would try different apples in the future. I didn't care for the McIntosh, and would prefer some Romes, Gravensteins or Galas. Because I used my crust recipe, I had one of those big airy crust tents, where the crust sets up before the apples cook down and settle, but that was OK. Once you cut into the pie, the crust fell neatly over the apples. I loved the hint of lemon, from the zest. This pie was delicious- especially good with some Hagen Daas, or fresh whipped cream.
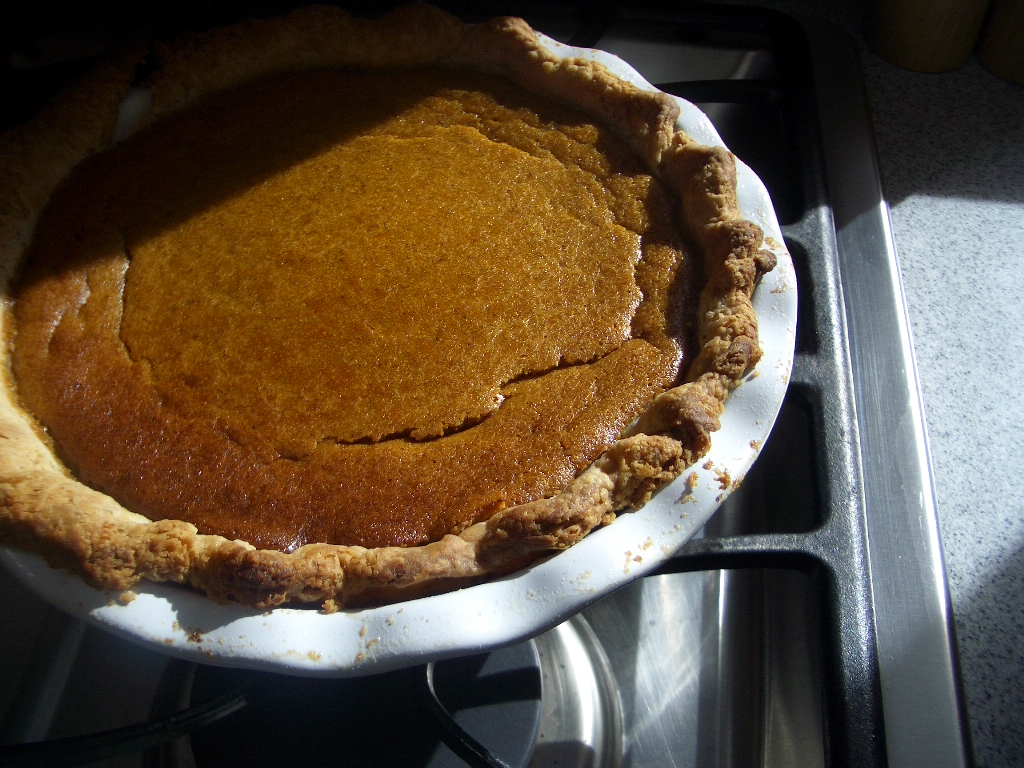
A note about the pie plate- My mother-in-law bought me this pie plate a couple of years ago and I was very skeptical. But I have to say, it works brilliantly. It's got these little bumps in it that make the crust so crisp, even underneath where it's usually kind of soggy. It comes with a ring that you can put over your crust if it's getting too dark, as well. I give it a big kitchen tool thumbs up!
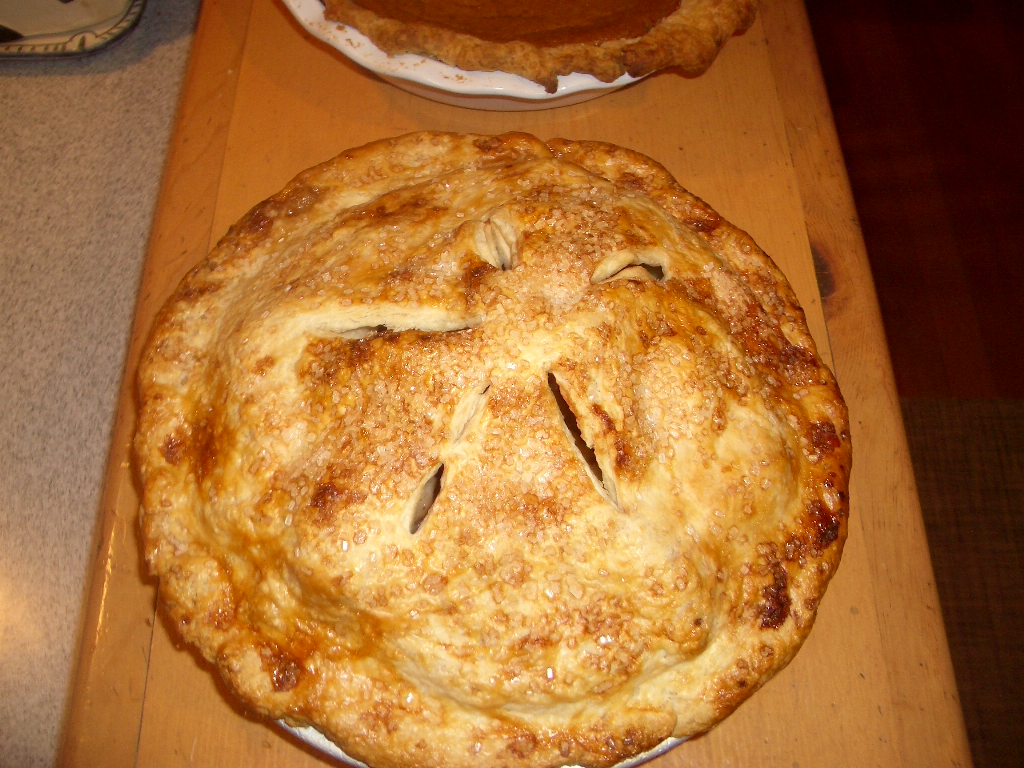
Apple Pie

1 recipe double pie dough
2 tbs. all-purpose flour
3 large Granny Smith apples (about 1 1/2 pounds)
4 large MacIntosh apples (about 2 pounds)
1 tbs. juice and 1 tsp. grated zest from 1 lemon
3/4 cup sugar
1/4 tsp. freshly grated nutmeg
1/4 tsp. ground cinnamon
1/8 tsp. ground allspice
1/4 tsp. kosher salt
1 egg white, beaten lightly
1 tbs. coarse sugar

Place a rimmed baking sheet on the lowest oven rack. Preheat oven to 500 degrees.
Repeat the process for the pumpkin pie crust as follows. When you're ready to make pie, take the dough out to temper a bit before you try to roll it. Spray your pie plate with a little Pam, or vegetable oil. (In theory, this means you could remove your pie from the pie plate before you serve it, because it won't be stuck to the plate (big oooo! factor here), but I do this because I think it helps the bottom brown, and it makes serving easier.) Roll out the dough to fit your pie plate, on a lightly floured board. Gently transfer the dough to the pie plate without stretching the dough. (Stretching is bad, it means shrinkage.) Press the dough along the sides of the plate, and then refrigerate the dough-lined pie plate.
Peel, core and quarter the apples. Cut the quarters into 1/4 inch slices, then toss with the lemon juice and zest. In a medium bowl, mix 3/4 cup granulated sugar, the flour, spices and salt. Toss the dry ingredients with the apples. Turn the fruit mixture, including the juices into the chilled pie shell and mound it in the middle.
Roll out the second piece of dough. Place it over the filling. Trim the edges of the top and bottom layers to 1/2 inch over the edge of the pie plate. Tuck the dough over itself so that it is even with the pan lip. Flute the edge, or seal it with a fork. Cut 4 slits in the top. Put the whole pie in the freezer for 10 minutes. Brush the egg white on the top crust, and sprinkle it evenly with the coarse sugar.
Place the pie on the baking sheet in the oven and lower the temperature to 425 degrees. Bake the pie until the top crust is golden, about 25 minutes. Rotate the pie from front to back and reduce the oven temperature to 375 degrees. Continue baking until the juices bubble and the crust is deep golden brown, 30-35 minutes longer. Transfer the pie to a wire rack to cool.

I use a melon-baller to core the apples.
Trying to mound all those apples in the pie shell is hard, but totally worth it. Do your best.
A note about the coarse sugar- I really like the way coarse sugar looks on baked goods. It's got much larger granules than regular granulated sugar. I buy it at the local cake supply shop, but I bet you could find it at Michael's as well.

Sunday, November 26, 2006

It's the PIES! Part 1: the Pumpkin Pie


Thanksgiving for me really isn't about the turkey, or the stuffing, or anything else- it's the pies! I always make 2 pies, one apple and one pumpkin. Because we were up at Lake Tahoe, I was nervous about the pies. We've done Thanksgiving there before. In past years I made the pies at home, then brought them up. I will never forget the year I made the pies at home on Tuesday night after work (too early), and by the time we were ready to eat the pumpkin pie, it had mold on it. Yes, mold. My mother-in-law (future mother-in-law at the time) had to scrape the mold off the pie. I was mortified. Then there was the year that I used the food processor to puree my pumpkin, instead of the blender. The pie had strings of pumpkin in it. It tasted like pumpkin pie, but was just a stringy mess. But this year I was feeling a little brave. I have a good crust, I've been making pies for many years now. I thought I could handle a high altitude operation. In the end, they came out great. I wish I could find a crust that is as attractive as it is good-tasting. I've found that the flakier my crust, the less pretty it is. But I'm willing to make that sacrifice! Here is my favorite part about this recipe. I was talking to my mom after Thanksgiving, and I asked her what she had made, and she too made a pumpkin pie. But she said she made it differently this year- with molasses. Now the recipe I have is from my mom, from many years ago, and it has molasses. So I'm not sure what recipe she used, or which one she gave me, but this is the one I have always referred to as "My Mom's Pumpkin Pie Recipe". So I will give her credit- this is from the wonderful Mom, with a few things I've learned about pie-making added in.

Pumpkin Pie

For the crust: (makes 1 double crust pie, and 1 single crust pie)
3 3/4 cups all-purpose flour
1 1/2 tsp. kosher salt
1 1/2 tsp. sugar
1 1/2 cups (3 sticks) unsalted butter, cold!
1/2-3/4 cups ice water
Cut the butter into 1/2 inch pieces, place in a bowl, then in the freezer. Place the flour, sugar and salt in the bowl of a food processor, and process for a few seconds. Put the bowl of the food preocessor with the flour mixture into the freezer. Fill a measuring cup with ice water. Take the butter and flour out of the freezer, and add the butter pieces to the flour mixture. Process for 10 seconds- pulsing 1 second at a time. The butter should be big pea size. Dump the mixture into a bowl, drizzle 1/4 cup ice water over the mixture and using a spatula, press the dough together with the water. (This feels like it takes forever, and it does, but you will be rewarded with big chunks of butter in your crust. Remember- big chunks butter=flaky crust.) Turn out dough onto a lightly floured board, and divide into 3 disks. Wrap each disk in plastic wrap and refrigerate atleast 1 hour. You can make this ahead and refrigerate 1 day, or freeze up to 1 month.
When you're ready to make pie, take the dough out to temper a bit before you try to roll it. Spray your pie plate with a little Pam, or vegetable oil. (In theory, this means you could remove your pie from the pie plate before you serve it, because it won't be stuck to the plate (big oooo! factor here), but I do this because I think it helps the bottom brown, and it makes serving easier.) Roll out the dough to fit your pie plate, on a lightly floured board. Gently transfer the dough to the pie plate without stretching the dough. (Stretching is bad, it means shrinkage.) Press the dough along the sides of the plate, and then trim and crimp the edge however you like. I cut the dough 1/2 inch over the edge, then fold it under all the way around, and attempt the little pie crimping scalloped edge. Place the prepared pie crust in the fridge while you make the filling.

For the filling: (makes 1 deep pumpkin pie)
3 eggs
1 1/2-2 cups drained pureed pumpkin
3/4 cups sugar
2 tbs. molasses
1 tsp. cinnamon
1/2 tsp. ground ginger
1/4 tsp. freshly ground nutmeg
1/4 tsp. ground cloves
1/2 tsp. kosher salt
3/4 cups whole milk
3/4 cups heavy cream

Preheat oven to 425 degrees on convection bake. In the bowl of an electric mixer fitted with the paddle attachment, beat the eggs; add the sugar. In a small bowl, combine the spices. Add the spices to the egg mixture. On low speed, add the pumpkin. Stir in the milk and cream. Pour mixture into a prepared pie crust. Bake at 425 convection for 15 minutes, then turn the heat down to 350 degrees and bake another 45 minutes. Cover the crust with foil if it's browning too fast.

Monday, November 20, 2006

Turkey Tail Rolls


These are a sympton of my inner desire for cutesiness, which comes out every once in a while. It's from the same urge that had me folding the napkins for Easter into little bunny rabbits. I just thought they looked so cute! Little turkey tails. Who doesn't love food shaped like animals? My grandmother used to make crescent rolls for Christmas or Thanksgiving. Not from scratch, but from the wonderful round can you buy at the grocery store, that went pop! when you twisted it open. I could down three of those little rolls in one sitting. But I'm not making crescent rolls- crescent rolls are the back-up plan for my turkey tail rolls not making it up to Tahoe. Because of the altitude, I'm baking these rolls here, freezing them, then thawing and heating them up in the mountains. I'll let you know how it went. I plan on testing one before we go. This is a delightful Martha Stewart recipe.

Turkey Tail Rolls

14 Tbs. unsalted butter, cut into small pieces, plus more for bowl and tin
1 1/4 cup warm milk (about 110°)
1 envelope (1/4 ounce) active dry yeast
3 Tbs. sugar
1 3/4 tsp. kosher salt
5 1/2 cups all-purpose flour, plus more for work surface
3 large eggs, lightly beaten

Butter a large bowl and a 12-cup standard muffin tin; set aside. Stir together 1/2 cup milk and the yeast in a bowl. Let stand until foamy, 5 minutes.
Bring remaining 3/4 cup milk to a simmer in a medium pan. Remove from heat. Add 6 tablespoons butter, the sugar, and salt; stir until butter melts. Set aside.
Put 4 1/2 cups flour into the bowl of an electric mixer. Make a well in the center, and pour in yeast mixture, butter mixture, and the eggs. Attach bowl to mixer fitted with the dough hook; mix on low speed until dough just comes together, about 2 minutes. Turn out onto a lightly floured surface; knead until smooth and no longer sticky, about 5 minutes, adding remaining cup flour as needed. Transfer to buttered bowl, turning to coat. Cover with a clean kitchen towel. Let rise in a warm, draft-free place until almost doubled in bulk, about 1 hour. Punch down dough; let rest 10 minutes.
Divide dough in half; cover half with a towel. On a lightly floured surface, roll out remaining half to 1/4 inch thick. Cut to 12 by 9 1/2 inches, discarding scraps. Position short side of dough parallel to counter's edge. Cut crosswise into six 2-inch strips. Cut strips crosswise into 3 1/2-inch, 3 1/4-inch, and 2 3/4-inch pieces.
Preheat oven to 375°. Melt remaining 8 tablespoons butter in a skillet. Brush all pieces of dough with melted butter; reserve some for brushing tops. Center and stack pieces from each strip, largest to smallest (you will have 6 stacks). Fold each stack in half lengthwise; fit, folded edge down, into a prepared muffin cup, making a V. Cover with a towel; let rise in a warm, draft-free place 30 minutes. Repeat process with remaining dough.
Brush melted butter over top of each roll. Bake until golden brown, 15 to 20 minutes. Brush with more melted butter; serve hot or at room temperature.

The recipe was really quite easy, but I found that I had a lot of dough leftover. I froze the rolls the day I baked them, then defrosted and heated 1 the next day. It was delicious- nice and buttery and light. By the time they got up to the lake, they weren't so great. They were a little heavy, and needed a pat or two of butter. Abbie enjoyed them immensely, and ate nothing but the rolls and a little turkey at dinner. I do need to say this though- we didn't need to throw any away.

Sunday, November 19, 2006

Pecan Bars


We've been traveling. We had a lovely visit back east with my family. I was itchin' to get back in the kitchen, though. Eileen made the banana bread while we were there. She used margarine, instead of butter, and baked the bread as one loaf in a glass pan. Delicious! We celebrated my grandmother's 88th birthday. We had a good time. Sending thanks to my family- we had a great visit!
While I was away, I kept thinking about Thanksgiving. This being a cooking holiday, I get very excited. I'm making the pies- pumpkin and apple, and I made some dinner rolls( for a future post). My father-in-law likes pecan pie. We never had pecan pie in my family. It was always pumpkin and apple- maybe some rogue cherry would show up, but always apple and pumpkin. I don't make pecan pie. It's not that I'm against it, but jeez, there's only going to be 6 of us this year, including the baby. We can't eat 3 pies. Well, we could, but we shouldn't. And I have to have apple and pumpkin. So I was watching Ina the other day, (you know where this is going: BUTTER), and I saw her make these pecan squares, dipped in chocolate. I don't know how you could eat one of these dipped in chocolate. They are so sweet and so good. I really wasn't crazy about them the first or second day. By today, though, I ate 1 1/2, and had to force myself to forget they were in the fridge. Ina says this yields 20 bars. I got 48. You should cut them small. They are super rich. So my father-in-law will have some pecan something, and I don't think he'll miss his pie. This comes from the indispensable Barefoot Contessa Cookbook.

Pecan Squares

Crust
1 1/4 pounds unsalted butter, at room temperature
3/4 cup granulated sugar
3 eggs
3/4 tsp. good vanilla
4 1/2 cups all-purpose flour
1/2 tsp. baking powder
1/4 tsp. salt

Topping
1 pound unsalted butter
1 cup honey
3 cups light brown sugar*
1 tsp. grated lemon zest
1 tsp. grated orange zest
1/4 cup heavy cream
2 pounds pecans, coarsely chopped

Preheat the oven to 350 degrees.
For the crust, beat the butter and granulated sugar in the bowl of an electric mixer fitted with the paddle attachment, until light, approximately 3 minutes. Add the eggs and the vanilla and mix well. Whisk together the flour, baking powder and salt. Mix the dry ingredients into the batter with the mixer on low speed until just combined. Press the dough evenly into an ungreased 18 X 12 X 1 inch baking sheet, making an edge around the outside. It will be very sticky; sprinkle the dough and your hands lightly with flour. Bake for 15 minutes, until the crust is set but not browned. Allow to cool.
For the topping, combine the butter, honey, brown sugar, and zests in a large, heavy bottomed saucepan. Cook over low heat until the butter is melted, using a wooden spoon to stir. Raise the heat and boil for 3 minutes. Remove from the heat. Stir in the heavy cream and pecans. Pour over the crust, trying not to get the filling between the crust and the pan. Bake for 25 to 30 minutes, until the filling is set. Remove from the oven and allow to cool. Wrap in plastic wrap and refrigerate until cold. Cut into bars and serve.

* I ran out of brown sugar and had to use the home substitution- molasses and granulated sugar. 1 cup of brown sugar= 1 cup granulated sugar + 1/2 cup molasses. I wonder if the bars are different if you follow the directions.
The dough was indeed very sticky. It was pretty tough getting into the pan and making it even.
You really do want a large saucepan. The sugar can boil up and scare the bejeesits out of you.
You will get the filling between the crust and the pan.
Husband was at a driving event and Abbie and I went to see him. I wanted to bring him some bars, so I cut them before they were cool. Don't do that.
Ina puts in a note that the filling will bubble over the edge of the pan in the oven. It does, and it did. But she says to put tinfoil or a larger baking sheet on a lower oven rack. I did, but I thought, why didn't I just put the tinfoil directly under the pan in the oven, instead of letting it drip between the racks.

Tuesday, November 07, 2006

Whole Wheat Bread


My brother is vegan. I find this sometimes difficult to understand. How could a person limit themselves so severely? How could anyone have so much self-control?! But I also find it fascinating- another way that people relate to food. It also presents a challenge. How do you cook or bake when so many ingredients are not allowed? When I do make something that happens to be vegan, I get so excited. Gary could eat this!! I must tell him! I must share this new vegan knowledge. So this post is for my brother- I made vegan bread! You must try it. This bread is not only for the vegan in your life. It actually just happens to not have any animal products in it. This recipe calls for honey, but I've used molasses instead. Now I'm wondering if molasses are one of those no-no ingredients. I don't think so. So this is great bread for anyone. It is the perfect peanut butter and jelly whole wheat sandwich bread, or for toast in the morning. It's easy to prepare, so I bake a couple of loaves every week and a half or so. Eat one now, and freeze the other for when you run out. When you get the hang of this, you can bang out a couple of loaves in the morning and have it for sandwiches at noon. The original recipe is from the Cheeseboard Collective Works.

Whole Wheat Bread
1 tbs. active dry yeast
1 cup warm water (100-110 degrees)
6 1/2 cups whole wheat flour
1 tbs. kosher salt
1 1/2 cups warmish water
1/2 cup molasses (honey or maple syrup)

In a measuring cup, whisk the yeast into the cup of warm water until dissolved. Let stand 5 minutes.
In the bowl of a stand mixer fitted with the paddle attachment, combine the flour and salt. Add the yeast mixture, warmish water, and molasses. Mix on low speed until the ingredients are combined, about 2 minutes. Switch to the dough hook, increase the speed to medium, and knead for 10 minutes. While the dough is kneading, brush vegetable oil in a large bowl, and on a piece of plastic wrap. Transfer the dough to a lightly floured surface, and knead by hand for a few minutes. Form the dough into a ball, and turn it in the bowl until it is coated with oil. Cover the bowl with the plastic wrap and let rise in a warm place 1 hour.
Brush vegetable oil on 2 loaf pans. Transfer the dough to a lightly floured surface and divide it into 2 pieces. (If you don't mind the mess, leave the flour from the first kneading on your board, and use it again.) Don't throw away your plastic wrap! Gently form each piece into a loose round, and cover with your oiled plastic wrap. Let rest 10 minutes. Gently press each round into a rectangle 9 inches (the width of your loaf pan) by 11 or 12 inches. Roll it up like a jelly roll, pinching the seam closed. Place the dough into the oiled pan seam side down, and gently press it into the pan to fill the gaps on the ends and sides. Repeat with the remaining round. Put the oiled plastic wrap over both loaves, and let rise again 45 minutes to an hour. Slash the loaves 15 minutes before the rise is finished, and preheat your oven to 450 degrees.
Place the loaves in the oven for 5 minutes. Reduce the oven temperature to 400 degrees, and bake 20 minutes. Turn the loaf pans around front to back, and left to right. Bake another 20 minutes, for a total of 45 minutes. Take the bread out of the pans, and let cool completely on a rack.

Sunday, November 05, 2006

Banana Chocolate Chip Bread


I am often in the uncomfortable position of having several bananas gone past their prime in my kitchen. They sit in my fruit bowl slowly turning a darker shade of brown. What do I do? I can't throw them away. That's good food for god's sake! So I desperately look for something to do with them. Smoothie? No, Abbie won't drink them. Ah, banana bread, you say. That's an excellent idea. However, most banana bread recipes call for one measly rotten banana. I have four on the counter, and two I threw in the freezer. I need more banana investment here! So I made something up. This is hardly bread. I should call it cake. It has chocolate. It uses THREE bananas. I feel so resourceful.

Banana Chocolate Chip Bread
1/2 cup unsalted butter, room temperature
1/2 cup sugar
1/4 cup brown sugar
2 eggs
3 mashed ripe bananas
1 1/2 tsp. good vanilla
2 cups all-purpose flour, plus 1 tbs.
1 cup semisweet chocolate chips
1/2 cup chopped pecans
1 tsp baking soda
1 tsp salt

Heat oven to 350 degrees. Grease a bread loaf pan, or 4 mini pans.
In the bowl of a mixer fitted with the paddle attachment, beat sugar and butter until light and fluffy. Beat in eggs. Add bananas and vanilla; blend well. Whisk together flour, baking soda and salt in a small bowl. In another bowl, mix chocolate chips, pecans, and 1 tbs. flour. Beat the flour mixture into the banana mixture just until combined. With a rubber spatula, mix nuts and chocolate into batter. Spread evenly into pan or pans.

Bake for 50-60 minutes for one loaf, or 30 minutes for mini loaves, until toothpick inserted in center
comes out clean. Cool 5 minutes. Remove from pan. Cool completely.

Thursday, November 02, 2006

Graham Crackers


I really like the idea of making things usually store-bought at home- just to see if it can be made at home, and made better. In this case, the answer is yes. Graham crackers are really wonderful. They are one of the perfect afternoon snacks. These crackers are quite different from store bought. They aren't as flaky, but are much more like a cracker. Inspired by my recent visit to the Ferry Building and Miette, I made my graham crackers round, instead of little rectangles. I think they actually taste better this way. For this reason, I also changed the directions slightly, needing to roll out the dough to make my rounds. I also added a little molasses. It gave the crackers just the right dark color. I found this recipe in dear Martha's Baking Handbook. I'm slowly working my way through it.

Graham Crackers

1 1/2 cups all prupose flour
1 1/2 cups graham flour
1 tsp. baking soda
1 tsp. ground cinnamon
1/2 tsp. salt
2 sticks, (1 cup), unsalted butter, room temperature
3/4 cup packed light brown sugar
2 tbs. honey
1 tbs. molasses

In a medium bowl, whisk together both flours, baking soda, cinnamon, and salt; set aside. In the bowl of an electric mixer fitted with the paddle, beat butter, brown sugar, and honey on medium speed until light and fluffy, 2 to 3 minutes, scraping down the sides of the bowl as needed. With mixer on low, add the flour mixture; beat until just combined.
Turn out the dough onto a lightly floured suface. Divide dough in half, and shape into disks. Wrap in plastic wrap and chill until firm. Place cookie sheets lined with Silpat baking mats or parchment in refrigerator as well.
Preheat the oven to 350 degrees. Remove dough from the refrigerator to temper slightly.
Roll out dough to 1/8 inch thickness. Cut using a biscuit cutter, then place cookies on chilled baking sheets. Place baking sheets with cookies back into the refrigerator for 10 minutes. Prick crackers with a fork. Transfer baking sheets to oven, and bake until edges are starting to brown, 15-18 minutes, rotating sheets halfway through baking. Leave cookies on sheets 2-3 minutes after taking them out of the oven. Transfer cookies to wire racks to cool completely.